To add to the application taskbar drag the shortcut onto the taskbar this like below.
Thursday, 19 June 2014
U2-A2-Task 3 - Reconfiguration of application toolbars
Reconfiguration of application toolbar
To add to the application taskbar drag the shortcut onto the taskbar this like below.
To add to the application taskbar drag the shortcut onto the taskbar this like below.
U2 - A2 - Task 5 - defragmenting
Defragmenting the hard drive
To defragment a hard drive you must go to computer and then right click on the drive icon and then select properties, now head over to the tools section.
To defragment a hard drive you must go to computer and then right click on the drive icon and then select properties, now head over to the tools section.
click the defragment now option to beginning the defragmenting process.
Wednesday, 18 June 2014
Unit 2 - Assignment 2 - Task 2 - organising and naming files also backingup P8)
Organisation and naming of files
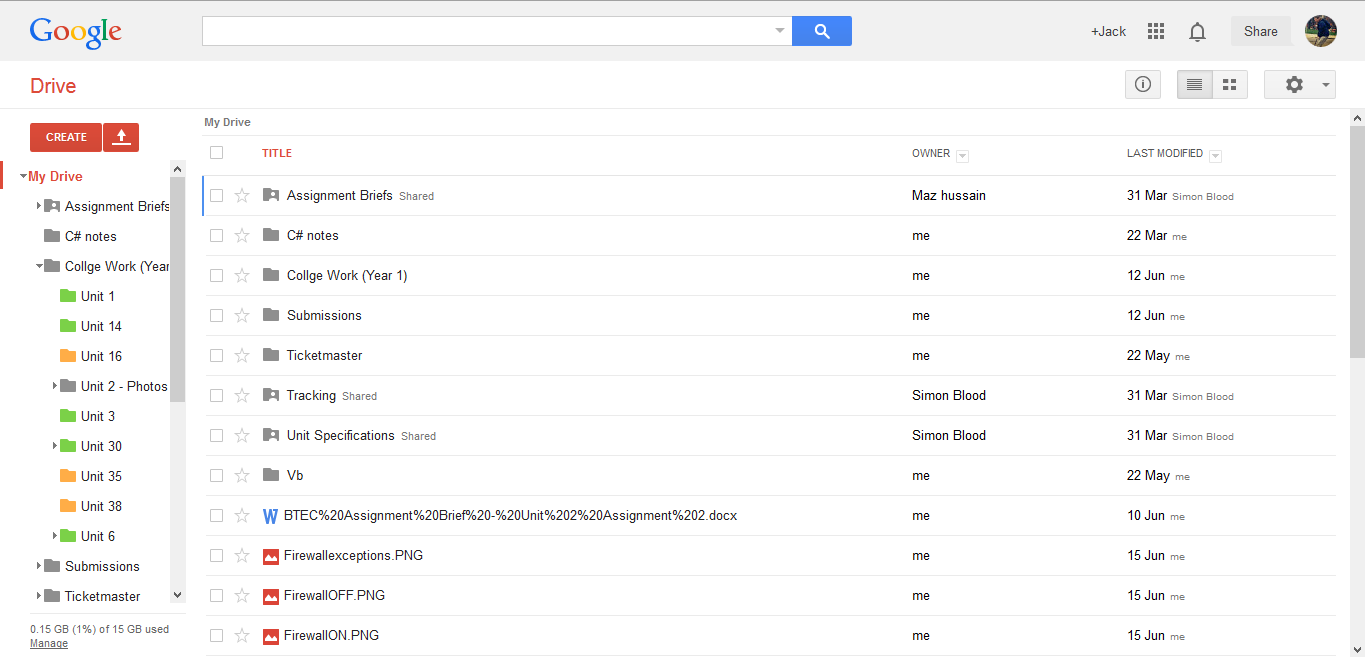
So that you can find you files and that they don't get lost you must organize them this can be done any way you like but in most cases it's the most logical for example my college work folder structure.
Using this folder structure shows that my work is organized by the unit it belongs to opposed to all being in a collective work folder . So this would allow you to organize work t make finding the area it's stored in easier but what about the actual file? well that's where file naming comes in, File must be named appropriately so they can be identified easily for example this text file that stores my info.
You can see here the file named 'My Information' has a more appropriate name as it can be identified easier and isn't vague enough to cause any doubt.
Backup procedures
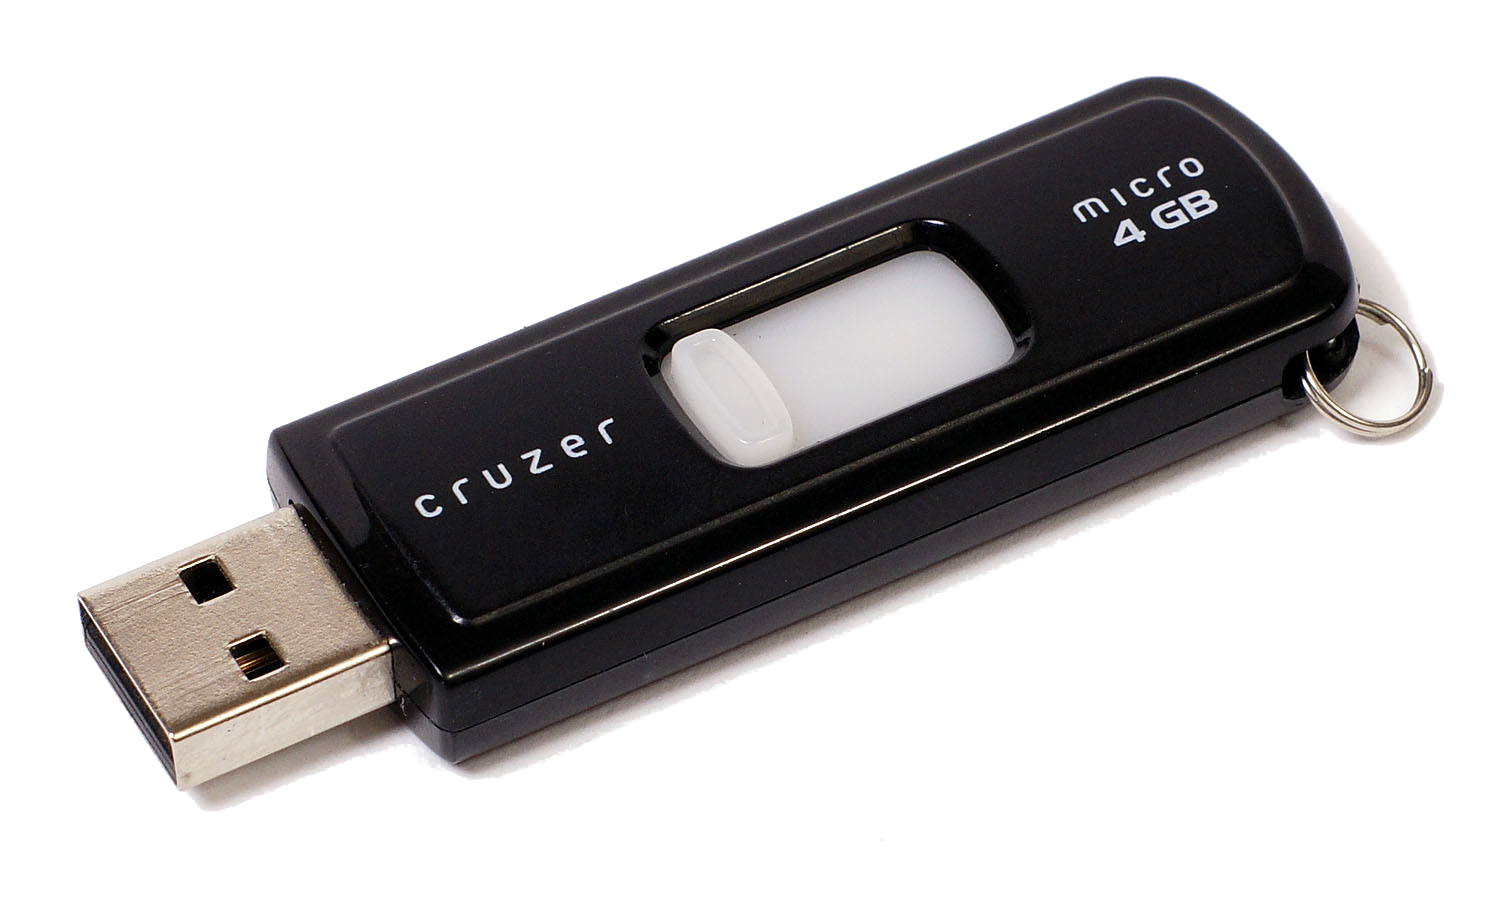
As data loss is a common occurrence it's a good idea to have a backup procedure in place, a back-up procedure is how you copy and archive the data stored on your computer so that it may be used to restore you computer to it's original state after data loss or corruption.Your backup procedure can be either online or offline, an online backup would any backup that requires the use of a computer network where as offline would be the use of hardware independent from the system for backup purposes for example a USB flash drive or an external hard drive.
Backup media
Regardless of how you decide to backup your data you will require backup media to store the backup on it could be something from the below list :
So that you can find you files and that they don't get lost you must organize them this can be done any way you like but in most cases it's the most logical for example my college work folder structure.
You can see here the file named 'My Information' has a more appropriate name as it can be identified easier and isn't vague enough to cause any doubt.
Backup procedures
As data loss is a common occurrence it's a good idea to have a backup procedure in place, a back-up procedure is how you copy and archive the data stored on your computer so that it may be used to restore you computer to it's original state after data loss or corruption.Your backup procedure can be either online or offline, an online backup would any backup that requires the use of a computer network where as offline would be the use of hardware independent from the system for backup purposes for example a USB flash drive or an external hard drive.


Backup media
Regardless of how you decide to backup your data you will require backup media to store the backup on it could be something from the below list :
- DVD
- Portable hard drives
- USB flash drive
- Tape drives/cartridges
- Network backup
- On-line
- CD
U2- A2 - Task 5 - Automatic scheduling
Automatic scheduling
automatic scheduling refers to how you can set certain tasks to be carried out automatically at per-set times and dates.You can see below how I've scheduled scans to occour on certain days and at the same time on each occassion.

automatic scheduling refers to how you can set certain tasks to be carried out automatically at per-set times and dates.You can see below how I've scheduled scans to occour on certain days and at the same time on each occassion.

the scan will now be automatically carried out without me needing to manually run an anti-virus scan.
U2 - A2 - Deleting temporary files and unwanted data
Deleting unwanted files
After using your system for sometime it's likely you'll notice that there are many files you don't want or need anymore so to keep your workspace clear you must delete them. You would do this by sending them to the recycle bin and then emptying the recycle bin .
Step 1 - selecting the unwanted files
you can see here that I'm selecting the files i want to delete I've then pressed the delete key things brings up a message box asking me to confirm my deletion.
Step 2 - emptying recycle bin
Right click the recycle bin and the select empty to get rid of the data.
Deleting temporary files
to delete the temporary files you carry out the same process but by going to the Temp folder.

After using your system for sometime it's likely you'll notice that there are many files you don't want or need anymore so to keep your workspace clear you must delete them. You would do this by sending them to the recycle bin and then emptying the recycle bin .
Step 1 - selecting the unwanted files
you can see here that I'm selecting the files i want to delete I've then pressed the delete key things brings up a message box asking me to confirm my deletion.
Right click the recycle bin and the select empty to get rid of the data.
Deleting temporary files
to delete the temporary files you carry out the same process but by going to the Temp folder.

U2 - A2 - Cleaning hardware (P8)
U2 - A2 - Task 5 - replacing consumables (printer paper)
Replacing consumables (printer paper)
The printer needs to be supplied with paper to print on when empty you will need to fill up the tray with paper.
Step 1 - Opening the tray
open the tray and pull it out


The printer needs to be supplied with paper to print on when empty you will need to fill up the tray with paper.
Step 1 - Opening the tray
open the tray and pull it out

Step 2 - Inserting the paper
Insert the paper into the paper tray and push to secure it.

U2 - A2 - Task 5 - replacing damaged components (P8)
You can see here that the connected keyboard is damaged and is missing some of the keys i therefore need to replace it.
Step1 - Unplug and remove the keyboard
Step 2 - Connecting the replacement
I now connected the the replacement keyboard as the previous keyboard was connected it's a USB keyboard so hot swapping is supported.
Unit 2 - A2 - Task 3 - Demonstrate how to set file sharing
Demonstrate how to set file sharing/permissions
Files can be shared between user accounts so that each account has access to the file, to do this simply right click on the file and select the share with option. The share with screen will look like the below picture you can select which user to share it with and the permission level they will have.
Files can be shared between user accounts so that each account has access to the file, to do this simply right click on the file and select the share with option. The share with screen will look like the below picture you can select which user to share it with and the permission level they will have.
Tuesday, 17 June 2014
U2 - A2 - T3 - (P6) How to create start-up options for a person with RSI
How to create start-up options for a person with RSI
Someone who has RSI would find it painful to move their fingers therefore it's uncomfortable for them to do a lot of typing or clicking.To make computer use easier and more comfortable for a sufferer of an RSI you can set up several things one of which is setting programs to open on startup, you can see below that internet explorer is in the startup folder and will open when Windows starts.
You could also set up speech recognition which is found in the ease of access section in the control panel, which would be very helpful as it's mean after setup a user with RSI would have rarely have to click or type.
U2 - A2 - T3 - (P6) Editing a desktop for a person with visual impairment
Editing a desktop for a person with visual impairment
If a user has visual impairment and plans on using a PCyou can consider making sertain chnages to make things easier for the. These changes are :
How to change icon size
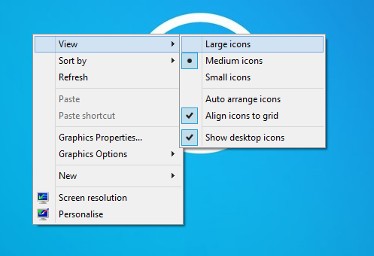
right click on the desktop and then hover of the view option this will show you the options for changing icon sizes.
How to change overall size
to change font size head to the control panel, appearance and personalization and then display.
If a user has visual impairment and plans on using a PCyou can consider making sertain chnages to make things easier for the. These changes are :
- icon size
- font size
- colour
- background
How to change icon size
right click on the desktop and then hover of the view option this will show you the options for changing icon sizes.
How to change overall size
to change font size head to the control panel, appearance and personalization and then display.
Once here you can change the size of all items which will increase the size of all on-screen items including this is shown below where i change from small to medium.
How to change font size
To do this you must also be in the display settings here you'll find this option below.
change the font size to your desired size then click the apply button.
U2 - A2 - T3 - (P6) Editing anti-virus configurations
Editing anti-virus configurations
Using AVG as my anti-virus of choice I'm going to demonstrate how to edit anti-virus configurations.
Step 1 - opening the settings
Firstly i opened AVG and went to the advanced settings option.
Step 2 - Configuring the anti-virus
Now you're able to configure the anti-virus select what you'd like to change from the menu to your left hand side. Here I've changed the identity protection settings from Automatically quarantining known threats to quarantining detected threats .
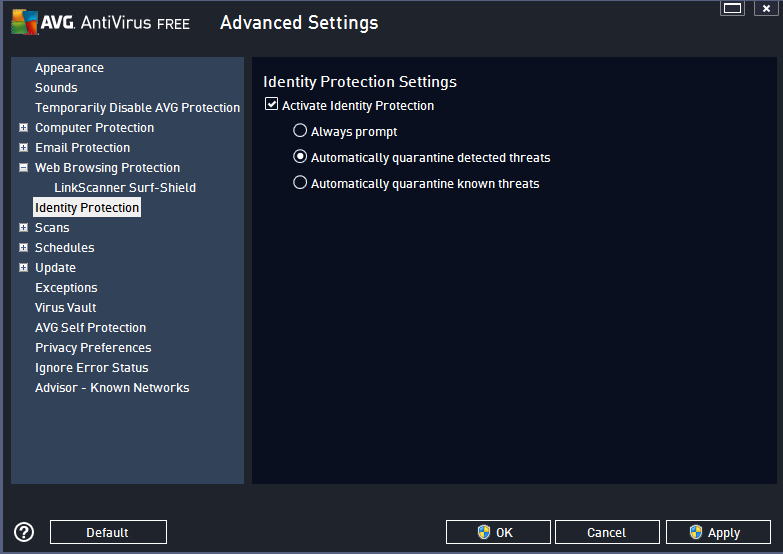
Once you've made the changes click apply for them to be applied.
Using AVG as my anti-virus of choice I'm going to demonstrate how to edit anti-virus configurations.
Step 1 - opening the settings
Firstly i opened AVG and went to the advanced settings option.
Step 2 - Configuring the anti-virus
Now you're able to configure the anti-virus select what you'd like to change from the menu to your left hand side. Here I've changed the identity protection settings from Automatically quarantining known threats to quarantining detected threats .

Once you've made the changes click apply for them to be applied.
U2 - A2 - T3 - (P6) Editing BIOS configurations
Editing BIOS configurations
Changing the BIOS password
When booting your PC you will see a message telling you which key to press to enter the BIOS it is likely to be one of the function keys e.g, F1 or F2 . Once in the BIOS navigate the menu until you security section you now select the change password option and the box shown below will appear.
Editing power management options
To change power management options you will head over to the power section in the BIOS, once here can change the power management options like i do below .
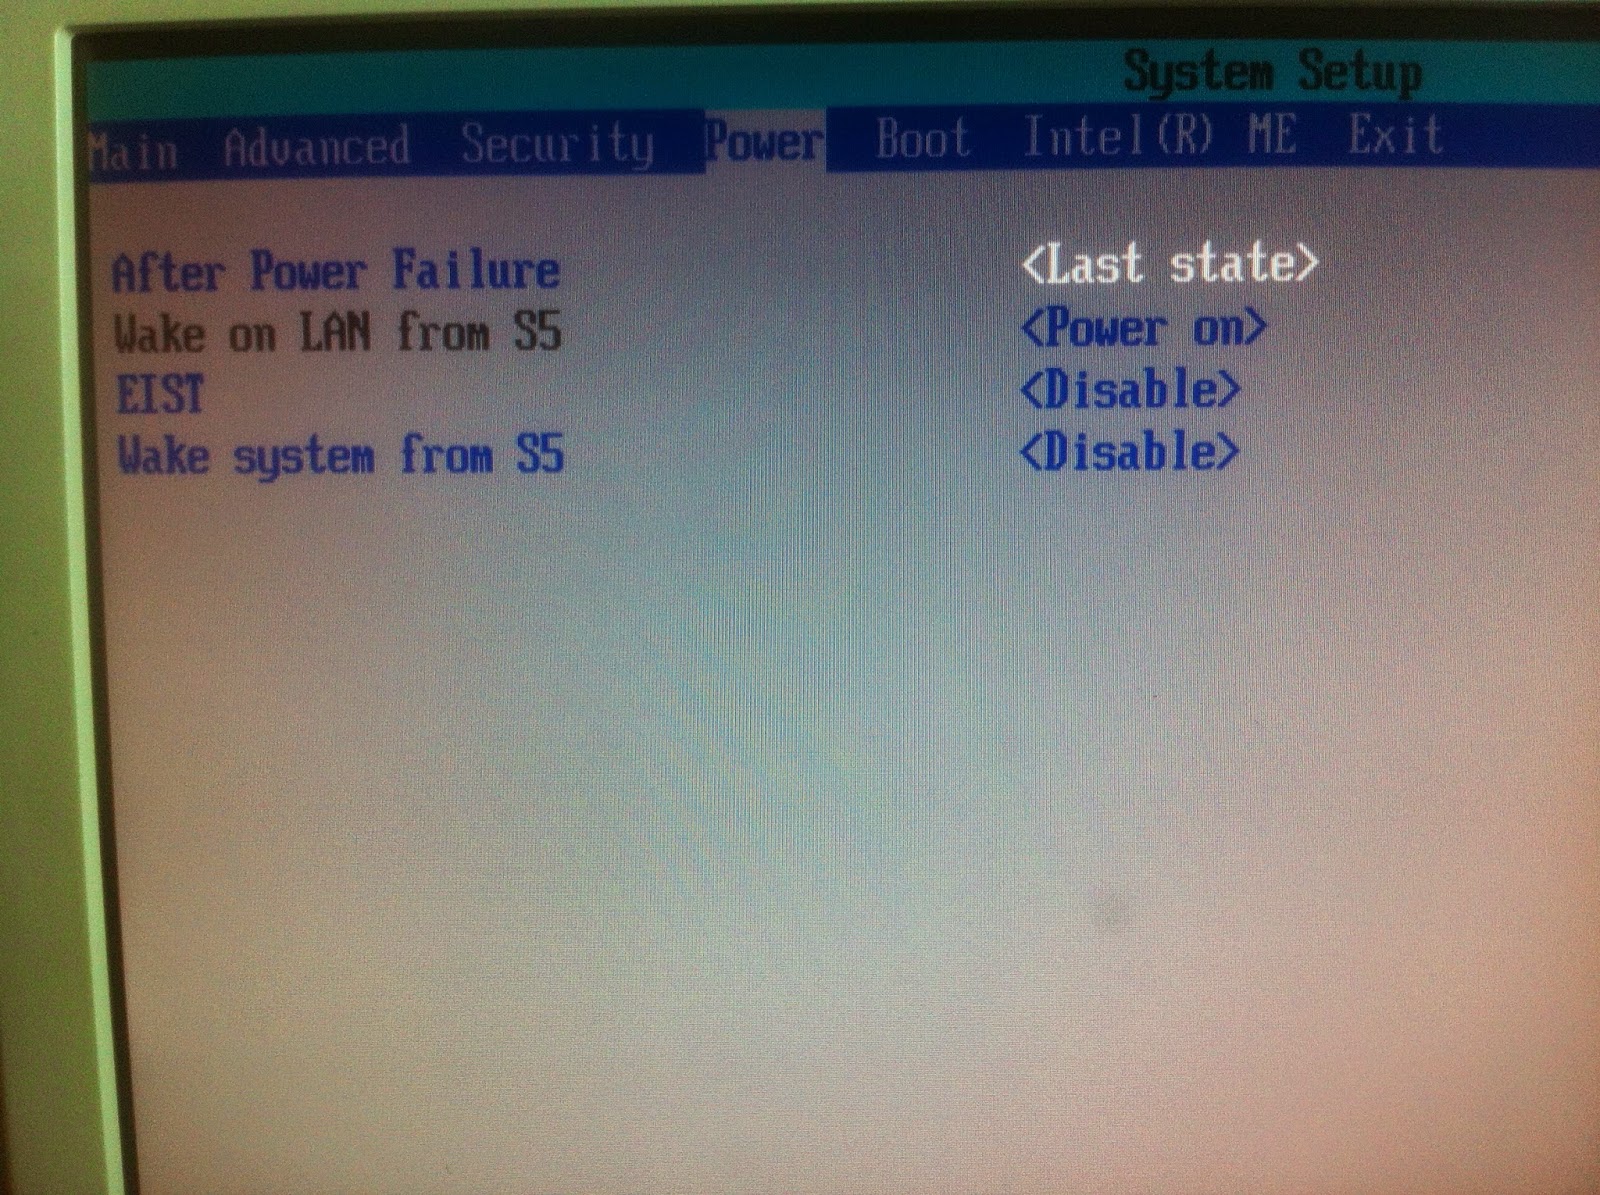
Select the option you wish to change like above and then use the arrow keys to change it .

Changing the BIOS password
When booting your PC you will see a message telling you which key to press to enter the BIOS it is likely to be one of the function keys e.g, F1 or F2 . Once in the BIOS navigate the menu until you security section you now select the change password option and the box shown below will appear.
Editing power management options
To change power management options you will head over to the power section in the BIOS, once here can change the power management options like i do below .

Select the option you wish to change like above and then use the arrow keys to change it .

Monday, 16 June 2014
Unit 2 - Assignment 2 - Task 2 - Creating appropriate folder structures
Creating appropriate folder structures
Using an appropriate folder structure is important so that you can find the files you need and keep things organized. So what is appropriate folder structure you might ask ?
Appropriate folder structures
Appropriate folder structures are those that follow logical and ordering and have appropriate names that describe their contents fr example you may use one like the one below to store your work in .
Sunday, 15 June 2014
Unit 2 - Assignment 2 - Task 2 - Install software (Security software)
Security software
So now you can create documents and do your work on your new computer system, as a precaution you may want install some security software just to protect you computer . In this section I'll show you how to set up an anti-virus and firewall on your computer.
Step 1 -Downloading the anti-virus
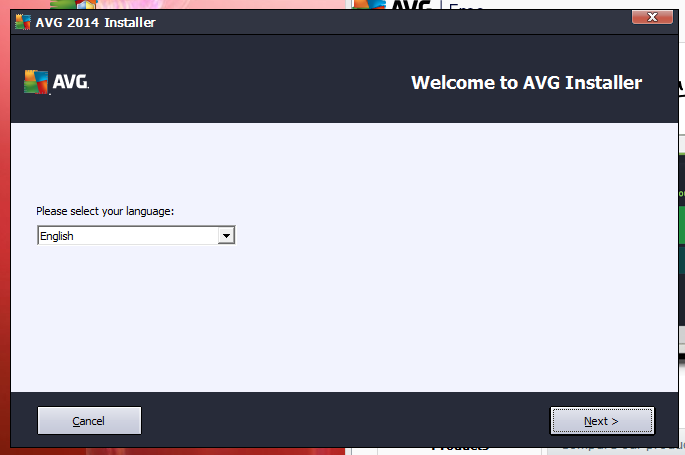
So to protect the computer i'm going to install the anti-virus AVG, go to the website free.AVG.com and download the free 30 day trial once downloaded double clicking the executeable file will start the installation (picture on the left).
Step 3 - finishing the installation
Now the installation is being carried out you'll have to wait for a few minutes, once finished you'll see the a 'Congratulations!' screen .
Step 4 - Using the ant-virus
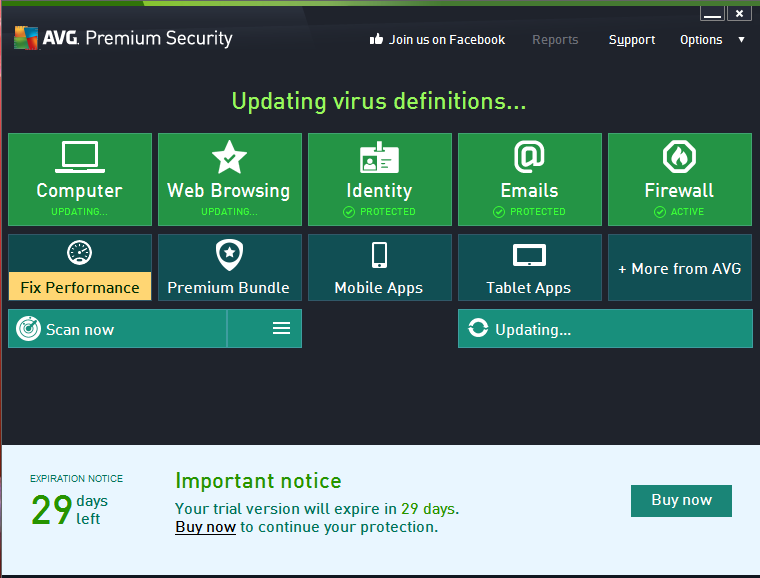
You can now use the AVG to perform actions like anti-virus scans and change the fiewall settings / make exceptions etc.
Firewalls
A firewall is an important tool also for protecting your computer therefore you should know how to use your computers firewall or set up a firewall .
The firewall
The AVG antivirus package comes with a firewall this firewall can be accessed by clicking on the firewall section of the AVG interface it should look like the picture below.
Turning the firewall on & off
Although it's not recommended you may need to turn off your firewall to do this simply click the setting button on the firewall screen. you would then click the relevant circle for example the disable firewall option here then click apply to confirm the changes (Note this requires administrator privileges) .
The above picture shows the firewall being turned back on .
Firewall settings
You may also need to make firewall exceptions for programs this is done from the applications section of the firewall menu (Here you can change settings for applications in the firewall) .
So now you can create documents and do your work on your new computer system, as a precaution you may want install some security software just to protect you computer . In this section I'll show you how to set up an anti-virus and firewall on your computer.
Step 1 -Downloading the anti-virus
So to protect the computer i'm going to install the anti-virus AVG, go to the website free.AVG.com and download the free 30 day trial once downloaded double clicking the executeable file will start the installation (picture on the left).
Step 2 - Installing the anti-virus
The files are now being extrated once finished select your langauge and agree to the terms and conditions so the installation can begin.
Step 3 - finishing the installation
Now the installation is being carried out you'll have to wait for a few minutes, once finished you'll see the a 'Congratulations!' screen .
Step 4 - Using the ant-virus
You can now use the AVG to perform actions like anti-virus scans and change the fiewall settings / make exceptions etc.
Firewalls
A firewall is an important tool also for protecting your computer therefore you should know how to use your computers firewall or set up a firewall .
The firewall
The AVG antivirus package comes with a firewall this firewall can be accessed by clicking on the firewall section of the AVG interface it should look like the picture below.
Turning the firewall on & off
Although it's not recommended you may need to turn off your firewall to do this simply click the setting button on the firewall screen. you would then click the relevant circle for example the disable firewall option here then click apply to confirm the changes (Note this requires administrator privileges) .
The above picture shows the firewall being turned back on .
Firewall settings
You may also need to make firewall exceptions for programs this is done from the applications section of the firewall menu (Here you can change settings for applications in the firewall) .
Friday, 13 June 2014
Unit 2 - Assignment 2 - Task 2 - Install software (Applications software)
Install software - Applications software
Now that we've got the computer system set up and the Windows 7 operating system is installed you may want to install a software suite such as libre office.
Step 1 - Downloading the software
Start by going to the libreOffice website which is http://www.libreoffice.org/ here you'll find a downloads section within which is the LibreOffice stable section, the download link for libre office is within this section.
Step 2 - Begining the installation
Now that you've downloaded libre office you should have the executable file that looks like the one below, double clicking this executeable file will begin he installation of LibreOffice .
Step 3 - Installing LibreOffice
Now that LibreOffice is installing it should look like the picture below.
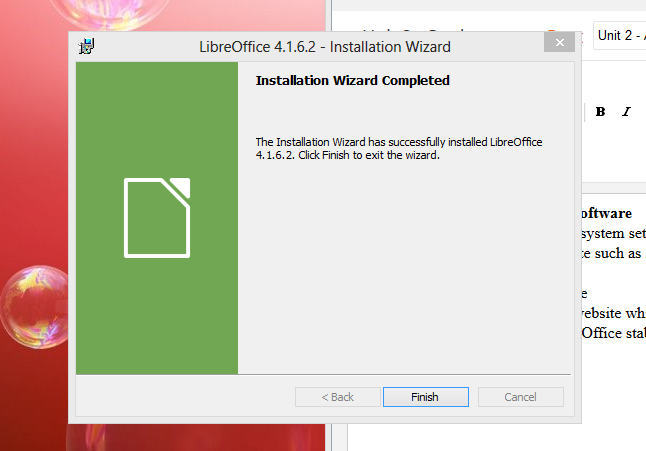
Once this is finished you will see a finish screen clikc finish an you're done installing LibreOffice and ready to use the software suite.

Step 4 - Using LibreOffice
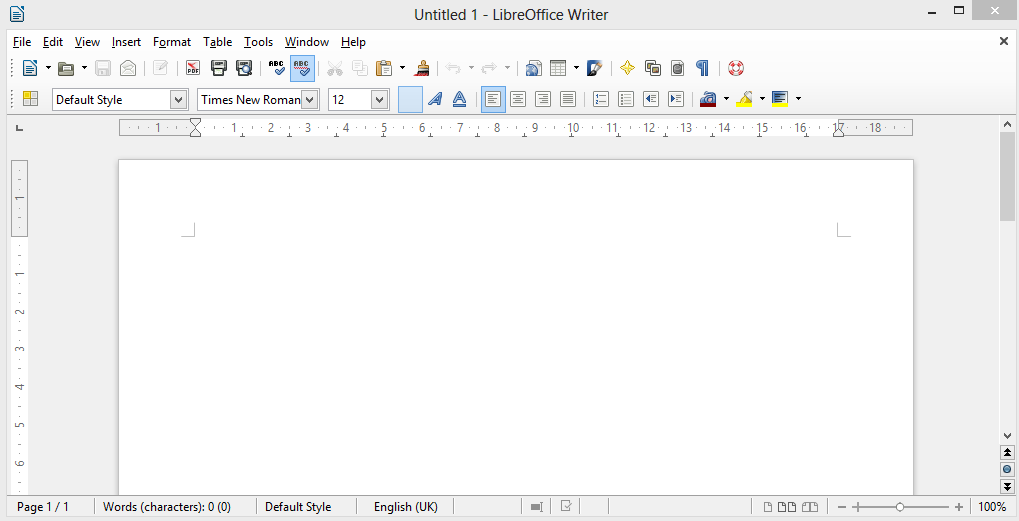
Once installed you can use any of the great pieces of software included in the LibreOffice software suite here's one example of me using the word processing software included in LibreOffice.

Subscribe to:
Comments (Atom)


